


EmuELEC turns your Android TV-Box into a retro console
Today we present our EmuELEC Installation Guide where we show you how to install it quickly and easily. EmuELEC is a compilation package of emulators with which we can play with countless consoles and retro recreational machines. We can use it as a KODI addon or as a stand-alone system from an SD or USB drive in our TV-Box, even the cheapest ones with 1GB of RAM. In this article we will see how to execute and configure it in a simple way.
|
Table of Contents
|
WHAT IS EMUELEC?
The EmuELEC software is a group of emulators that allows us to load roms, covers and other extras to play dozens of different systems in an orderly manner. To play them you need the ROMS or ISO of the games and some of these systems also require the BIOS images of the machine to emulate.
- Popular emulators: AMIGA, MSX, NES, SNES, GBA, MG, DREAMCAST, NDS, PS1, CPS1 / 2/3 …
- Not supported: PS2, PS3, GAMECUBE, 3DS, WII, XBOX
- Full list of emulated systems
ANDROID TV-BOX MODELS COMPATIBLE WITH EMUELEC
This is one of the points where we can have doubts when testing the system, but as we have seen we do not run any risk because we can test it without risking the installed Android system. Some TV-Boxes such as the Beelink have official support from this community and other Boxes can be compatible with the generic EmuELEC images, we will have to try it for ourselves. Normally we can emulate up to PS1 with powerful processors like the new S905X3 and S922X.
- List of the Best Android TV-Box models
- Official support: Raspberry Pi, Wetek, Odroid
- Amlogic S905 / S905X / S912: Hardkernel Odroid C2, Free Computer Le Potato, Pandora arcades (S912)
- Amlogic S905X2 / S905X3 / S922x / A311D: Beelink Gt-King / Gt-King Pro, Hardkernel Odroid N2, Khadas VIM3
- Rockchip: Not supported in stand-alone version using KODI Add-on
- Allwinner: Not supported in stand-alone version using KODI Add-on
EMUELEC INSTALLATION ON ANDROID TV-BOX
We have two ways to use EmuELEC, under KODI or through a USB memory or SD card that runs with a minimum Linux system to run and has many advantages over using KODI on Android even also some inconvenience associated with this system.
- Advantages EmuELEC independent OS :– The system only consumes 100 Mb of RAM– EmuELEC fits perfectly to the hardware of our device– We have automatic soda change to avoid the Judder effect
- Disadvantages EmuELEC independent OS:– We cannot run Android apps
- Disadvantages EmuELEC as KODI add-on:– The system consumes more resources by keeping Android running in addition to KODI + EmuELEC
EmuELEC independent in SD or USB
With this system EmuELEC brings out all the performance of our hardware. Each SoC family has a specific project branch where we can obtain the necessary files to operate EmuELEC or EmuELEC in our TV-Box.
IMG – system image
- Download RUFUS to create the USB memory or EmuELEC SD card from PC
-
EmuELEC-Amlogic.arm-x.x.x-generic.img.gz for S905 / S912EmuELEC-Amlogic-ng.arm-x.x.x-generic.img.gz for S905x2, S905x3, S922x / A311D (NG version)

How to create the boot unit for EmuELEC
Once we have the installation program, the EmuELEC system file and the device tree of our device we can already create the SD memory or USB drive to boot this system, we run the installation program. If it does not work by USB drive it is recommended to use an SD card, in any case you have to have the fastest possible drive if we are going to use it with this method.
- We need a microSD Card as fast as possible, at least 16GB and a PC card reader.
- Start RUFUS, select the USB drive or microSD card in the Device section.
- Click on Select and load the EmuELEC *.img.gz system file that we have downloaded.
- Clicking on Start and wait for the process to finish.

- At the end if you can ask us to format the card, we ignore it by pressing Cancel, if we do not have to repeat the process.
DTB – device tree
Once we have created the SD or USB drive we need the device tree of our specific TV-Box model or the one that is closest to the configuration of our device. It is a simple process if we follow the following steps.
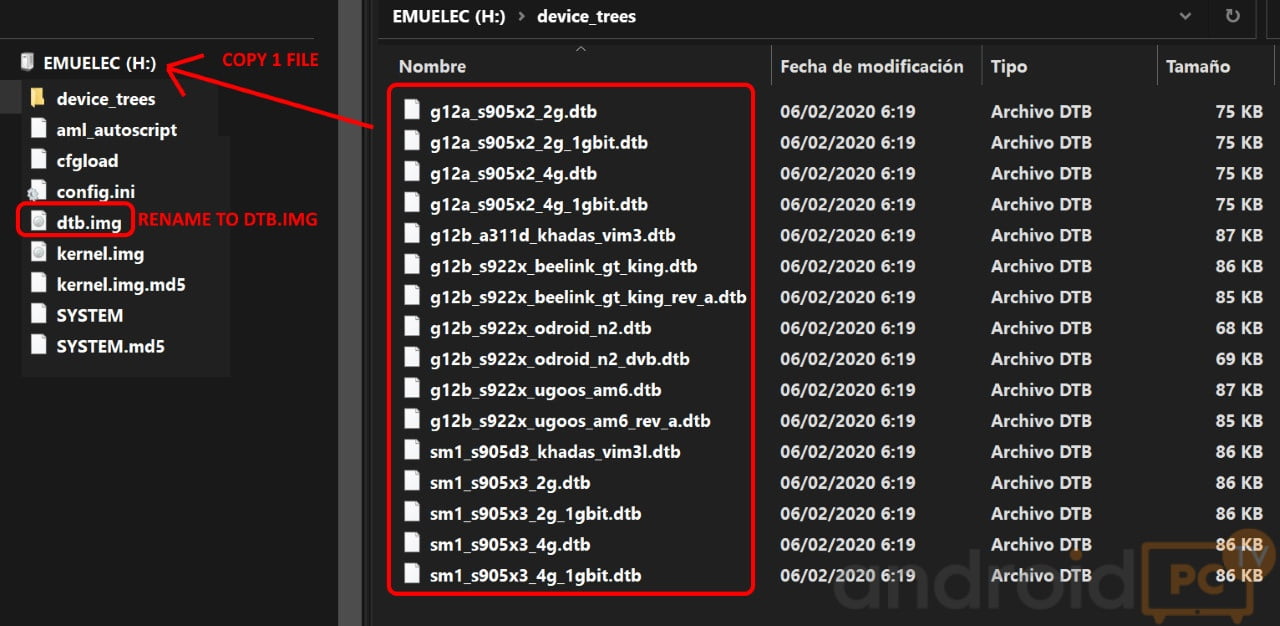
- Within the unit that we have created we go to the “device_trees” folder
- Inside we need a compatible device tree compatible with our system, we observe:– Concrete model or generic model.– Compatible processor: S905X2 / S905X3 / S922 …– RAM: 2GB, 4GB …– Network: 10/100 MB or 1 Gigabit
- Copy the file xxx.img more similar to our hardware to the root directory of the unit we have created.
- Rename it as “dtb.img” we overwrite if necessary.
EmuELEC as KODI add-on
This is the easiest way to use EmuELEC although it does not take full advantage of the hardware performance of our TV-Box.
- Install KODI in our Android TV-Box
-
script.emuelec.Amlogic.launcher-3.2-Amlogic.zip for S905 / S912script.emuelec.Amlogic-ng.launcher-3.2-Amlogic-ng.zip for S905x2, S905x3, S922x / A311D (NG version)
- Follow the guide of How to install an Add-on manually

EMUELEC BASIC CONFIGURATION
First boot
Before turning on the TV-Box, we must insert the prepared SD card and connect a compatible USB gamepad.
- With the TV-Box turned off introduce the microSD card or USB drive prepared with EmuELEC.
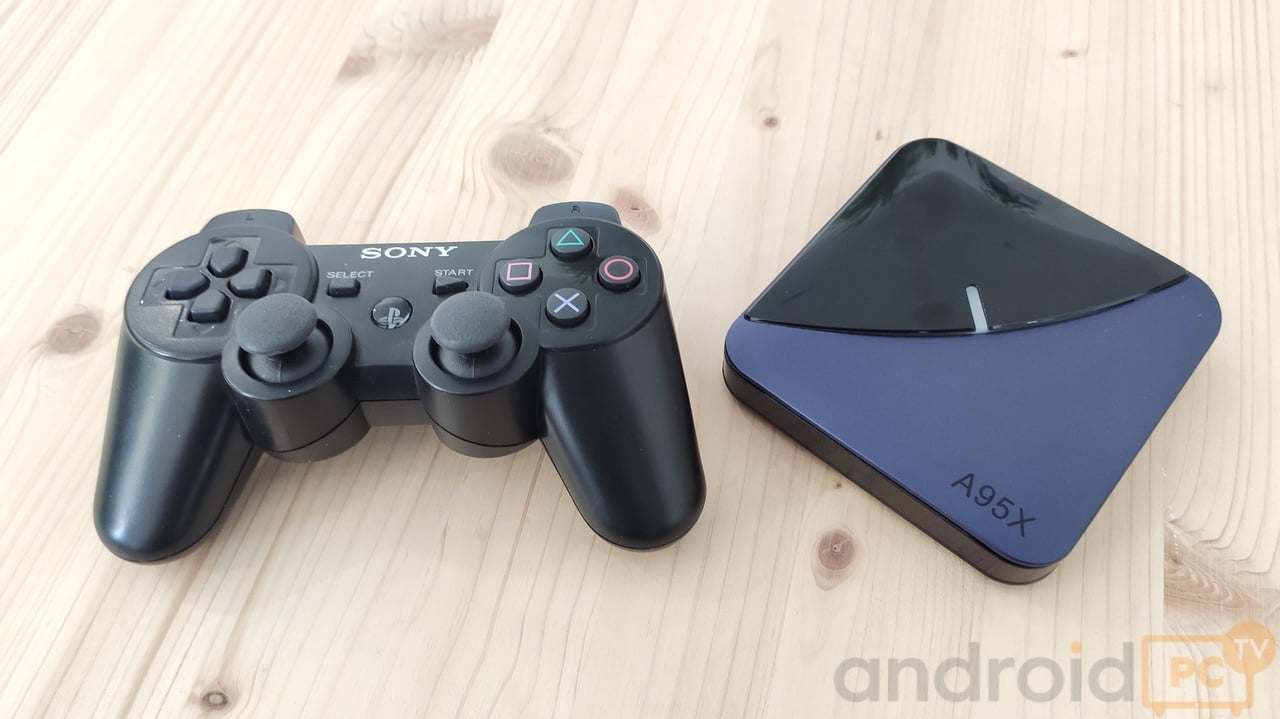
- Connect a compatible USB or BT Gamepad, the X360 and PS3 USB controls are the most compatible.
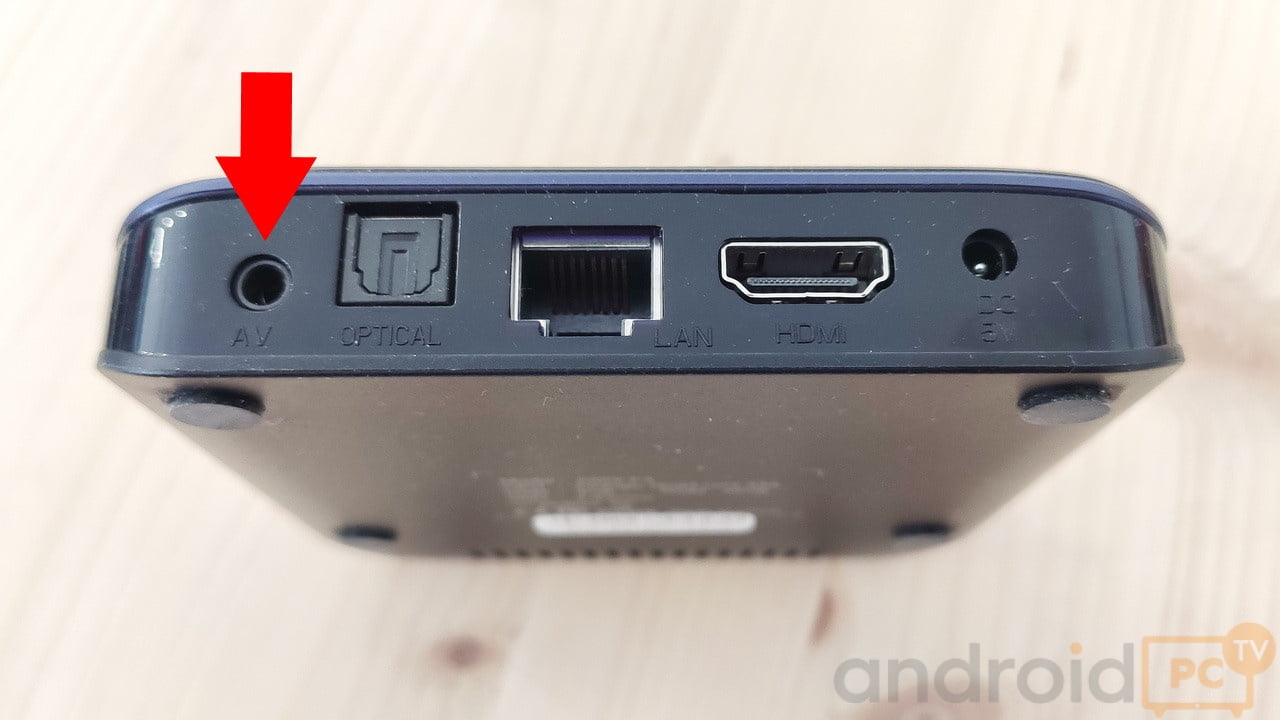
To start EmuELEC independently we have several methods available, basically the two options are by means of the update button of the TV-Box or from android reaching this mode by software.
- Mode 1: Start the TV-Box with the update button pressed, in a box or in an audio jack.
- Mode 2: Use the LibreELEC app for Android that restarts the TV-Box in update mode
- Mode 3: If we are root from a terminal on Android we do “su” and then “reboot update”
- IF YOU DON’T START: Try another device tree file from the folder we have in the SD.
- The first boot process is slow and we should not turn off the TV-Box until it restarts.
- The system will always boot into EmuELEC until we remove the SD card.
EmuELEC Gamepad Configuration
As we have mentioned, the compatible USB or BT Gamepad that are easier to connect only those of the X360 and PS3 type are the most compatible but we have others, even if we are lucky they can be used by the TV-Box’s Bluetooth adapter.
- Bluetooth gamepads will not work if EmuELEC cannot detect our Wifi / Bluetooth chip.
- Xbox S / Xbox 360 / Xbox one (via cable) Does not work on BT!
- Steam Controller (Only with the dongle)
- Sony PS4 / PS3 / PS2 (with USB adapter)
- 8bitdo SF360 Pro (BT and cable)
- Logitech F310
- Hori Horipad Switch controller
- USB RetroPad Adapter (Used to use original console controls)
- Switch joycons – Not recommended
In the first boot of EmueLEC we will always be asked the key configuration of our connected Gamepad, we just have to press the correct keys for each function.
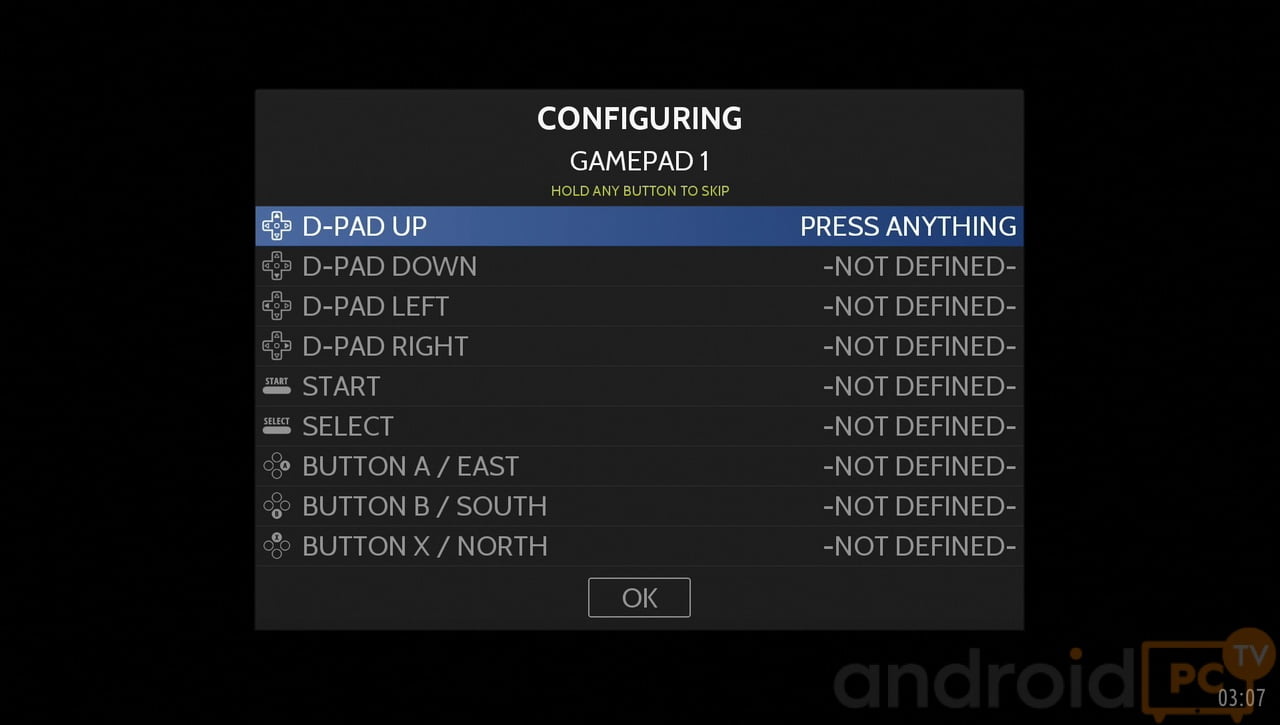
- Press B / O to enter the menus and A / X to exit.
- Select: we enter OPTIONS where we adjust the list of games and folders in the current system.
- Start: we enter the general settings MAIN MENU, we can redefine the controls and other system settings.
- Tip: to exit the games press Hotkey + Start 2 times.


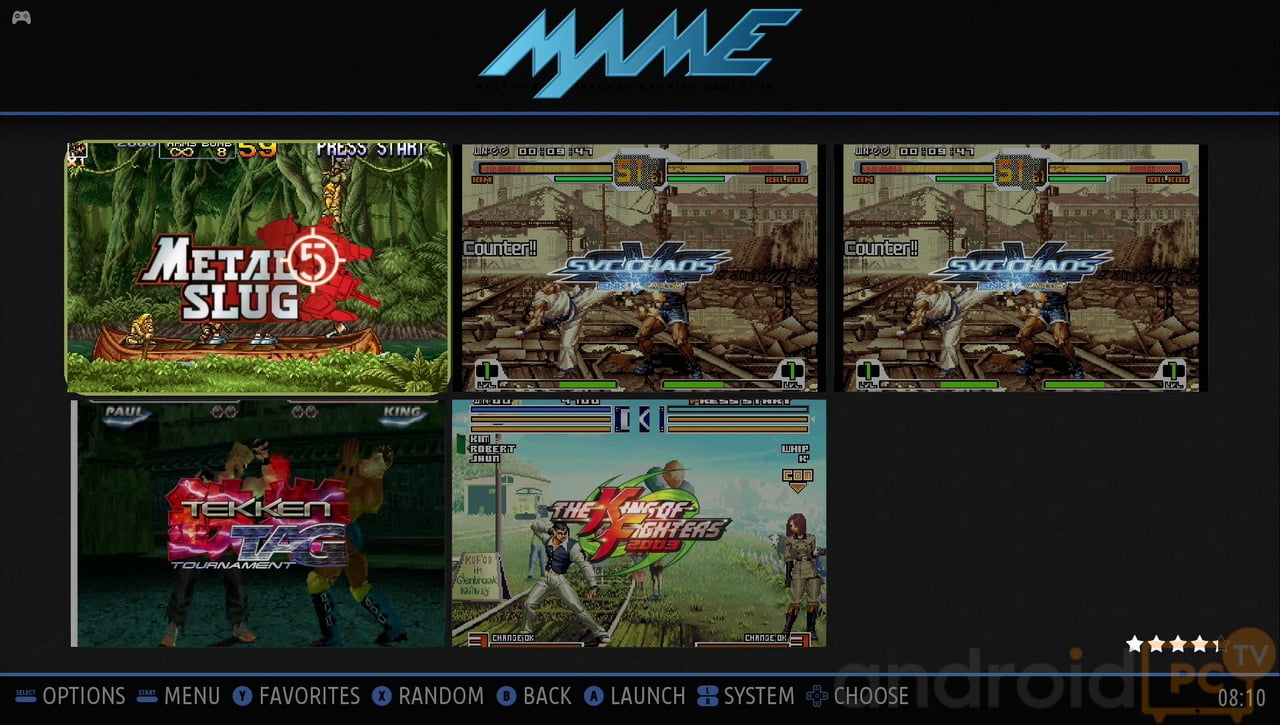
EmuELEC user environment
In the first boot of EmuELEC we are shown different sections of each installed emulator where we have the games installed, at the bottom we can see what action keys we have available.
- IMPORTANT NOTE: EmuELEC must always be turned off from MENU> QUIT> POWER OFF or the system may be corrupted.
- Tip: At the beginning ONLY Emulators are shown with games installed, if we don’t have games, emulators are not shown.

TV-Box temperature control in LibreELEC
If we are going to use LibreELEC intensively with powerful games, it is advisable to control the working temperature, if it reaches very high figures of 80ºC / 176ºF or more, the TV-Box can be turned off automatically.
- Check our recommended TV BOXES or read our reviews to see the best in that aspect.

INSTALL GAME ROMS, COVERS AND BIOS FOR EMUELEC
How to install ROMS on EmuELEC
There are several methods to install games in EmuELEC, in the internal memory of our SD card or using an external USB drive where we copy the games we want to emulate.
Copy games to EmuELEC internal memory
- We connect the TV-Box to our home network, it is recommended by cable although it can be by Wifi.
- In the settings MENU we go to NETWORK SETTINGS and point our IP address, eg 192.168.0.XX
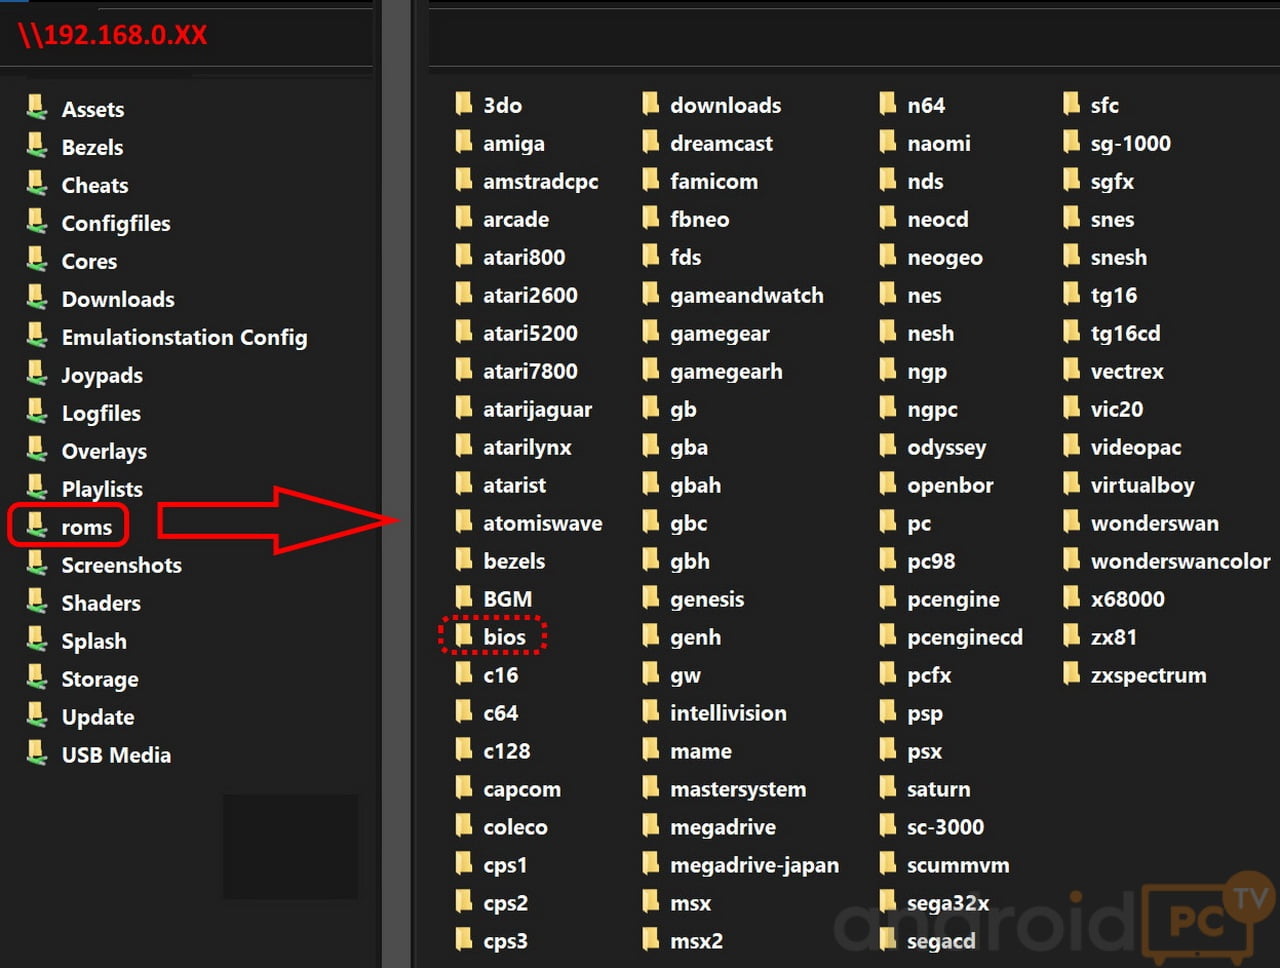
- On our PC in the file explorer bar we write the IP in this route: \\192.168.0.XX (with both against bars)
- We will be shown the EmuELEC internal folders, we enter the ROMS folder.
- Within this folder we have the folders corresponding to each system, we have to copy the roms in this folders.
Copy games to external USB memory
- We connect to our PC a USB memory formatted in NTFS.
- Inside the USB memory we create a folder with the name of ROMS.
- Inside ROMS we create an empty file with the name emulecroms (without extension).
- Within this ROMS folder we must create a folder for each emulator that interests us, respecting these names.
- We copy inside the folder with the name of the emulator the roms.
- We connect the USB to the TV-Box and restart it.
How to install BIOS on EmuELEC
Some systems such as PS1, PCEngine, NeoGeo, Dreamcast, GBA … require the BIOS files for the emulator to work, can be found on several websites, we cannot provide them.
- The process is identical to copying roms that you can see in the previous step.
- BIOS files must respect these names, rename them accordingly.
- The bios must be copied into ROMS \ BIOS either in the EmuELEC internal memory or in the external USB drive.
- We can check if we have the BIOS loaded in MAIN MENU> GAME SETTINGS > MISSING BIOS.
- Without the exact BIOS files, the games will not load
How to download game covers on Emmuc
To give a more attractive touch to EmuELEC we can install the covers of the games from the internet in various formats, the covers are downloaded automatically and also add information with descriptions.

- Connect our TV-Box to the internet.
- Press START in MENU> SCRAPER.
- Within ORIGIN OF THE BOX we can change the format between 2D and 3D.
- Click on GET SCRAPES NOW.
- We can limit to which emulators we want to download covers.
- Click on START.
- The SCRAPING process will begin, we wait for it to end.
- Once the process is finished it is recommended to restart to see the results.
- Within each category of games in OPTIONS we have to change the GAME LIST STYLE> BOXES
|


ليست هناك تعليقات :